 End of XP...Should you give Linux Ubuntu a try??
With the upcoming end of Windows XP support coming up quickly (April 8, 2014), it will be necessary to decide on a new operating system that you might like to use. What the end of support means is that there will no longer be any patches to your XP system and leave holes wide open to attack that no firewall or antivirus solution can fix.
Many of you may have reservations on upgrading to another Windows operating system such as Windows 7 or 8 because it can be a bit expensive, the older system hardware you have may not really be compatible with Windows 7/8 or you might just be flat out tired of Windows all together. There are alternatives to purchasing new Windows operating systems such as using a free Linux distro (operating system) like Ubuntu.
I, myself, am an Ubuntu fan and have been using it for about a year now. I have actually introduced my own wife and kids to Ubuntu and they love it as well.
I have provided some instructions below to download and run a Live CD so that you can test out how to Ubuntu works and whether or not this might be a viable option for you to use. I certainly hope that you enjoy...
------------------
Let's get started...first we will need to download a copy of Linux Ubuntu. I recommend that you download
Ubuntu 12.04 LTS (Long-Term Support) so that you will receive support for this particular system through,
presently, April 2017.
You can visit the page here to download your copy.
You will see where you need to choose between a 32 bit system or 64 bit....just be sure to choose what is applicable to you.
Now...when you select the version that applies to your system's needs, you are presented an option to make a donation to the makers of this particular distribution (this means operating system in Linux speak ![]() ) and this is completely up to you if you would like to, but have no doubt, this is a free operating system to use.
) and this is completely up to you if you would like to, but have no doubt, this is a free operating system to use.
If you change all of the numbers to 0, there will be a link created named Download just below the contribution total box. Press this and the download will automatically begin.
A file named something similar to ubuntu-12.04.4-dest....iso will begin downloading to your system. Don't worry, this is just the new .iso for your Ubuntu system downloading.
------------------
Once downloaded to your system, we will now need to make your new Ubuntu .iso into a bootable CD/DVD.
First, let's be sure to move it to your Desktop so that you can easily find it later.
Now we want to use a good .iso burning utility to create your new bootable CD/DVD.
I prefer to use Free ISO Burner. It is free, easy to use and most importantly, like I said, FREE! ![]()
You can use the link that I provided to read any documentation about the software that you like and also to download this software.
------------------
Now that Free ISO Burner has been downloaded and installed you need to fire it up and put a CD/DVD into the optical drive (CD/DVD drive). Let's take a look at the first screen:
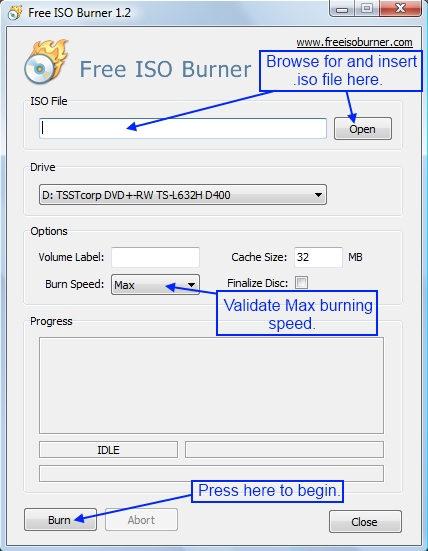
Press the Open button. This will take you to the next screen where you ensure Free ISO Burn knows what file to burn to disk. In the picture below you can see the small Open button that you can press and then browse to your Desktop where you saved your new Ubuntu.iso file. Be sure to select that.
You will need to verify Write Speeds available as well as be sure to use the slowest available Write speed.
Now, once all of that is done, press the Burn button and this will write your new .iso to disk.
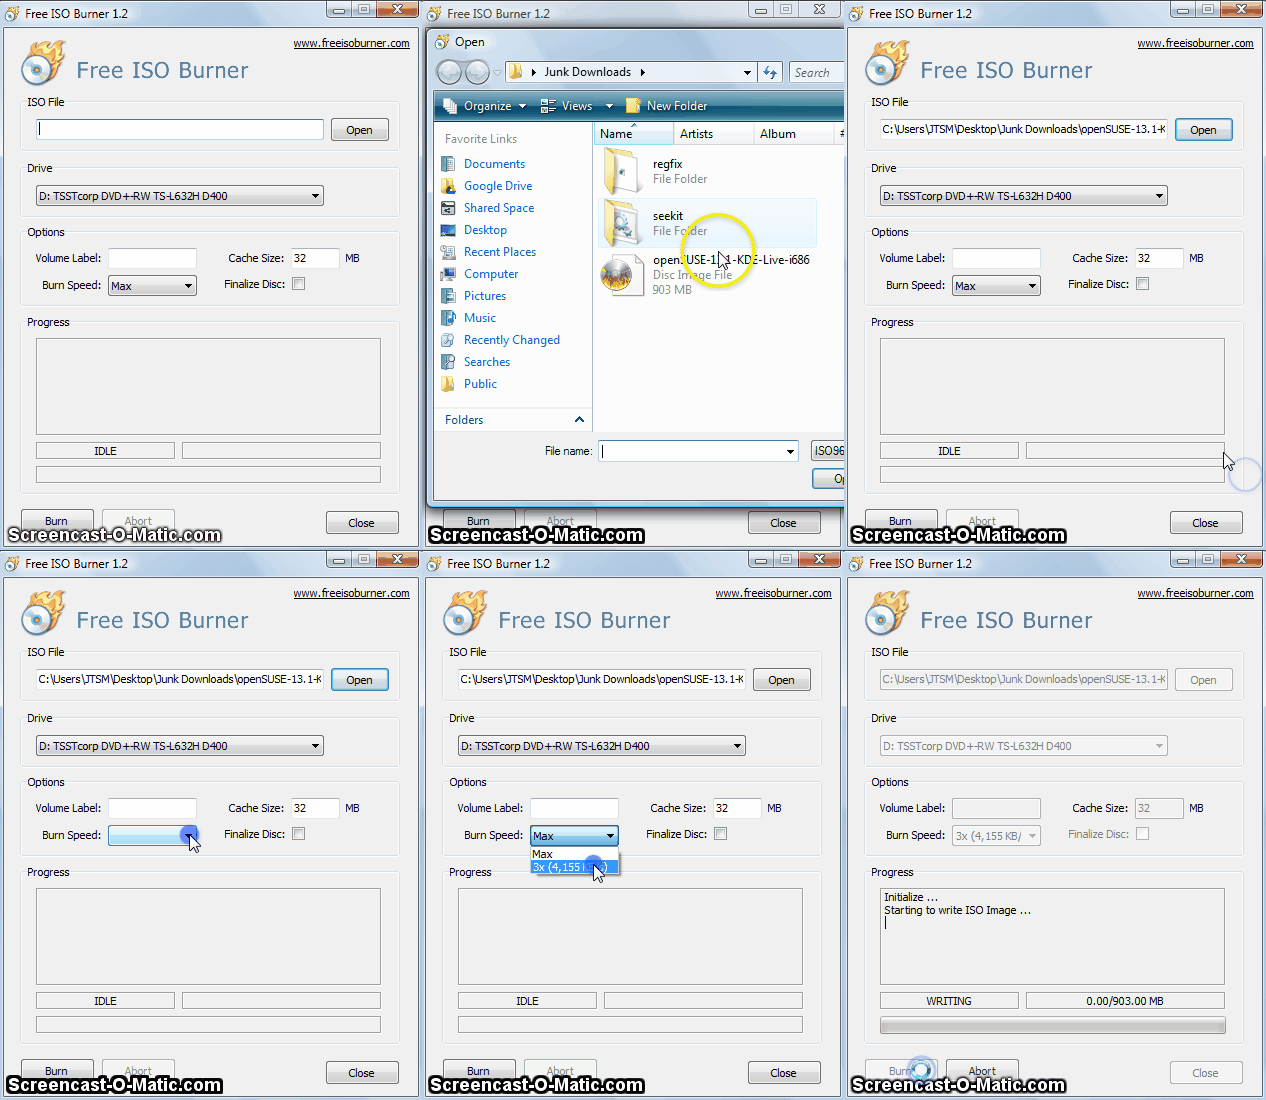
Just sit back and relax until done. Follow any and all prompts that occur until finished.
Congratulations!! You now have a new Linux Ubuntu Operating System disk!
------------------
Since we have been through all of this...now we want to actually see what Linux Ubunu would look like on your system.
What you made with Free ISO Burner was a Bootable Live CD of Linux Ubuntu. What we want to do is to reboot your system to use the newly made CD as the operating system instead of normal Windows.
To begin with, we will need to change what is called the Boot Order of your system so that the CD will be initialized first instead of Windows.
We will take this step-by-step:
Restart your computer.
Just as your system begins to boot up, begin rapidly tapping the Del or F2 key that you will be required for you to enter the BIOS Setup. You may need to try this more than once if not able to get into the BIOS Setup page.
Once you have pressed the appropriate key and entered the BIOS Setup Utility, you will be shown a very standard screen like the one below....
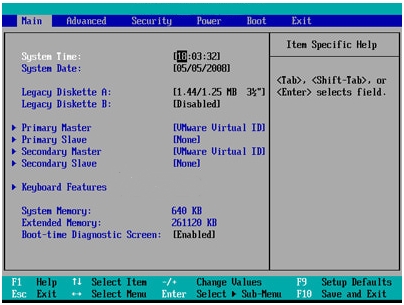
Using the <-/-> buttons, scroll right to where you find the Boot tab and press Enter. This will show your boot order screen such as what is shown below.
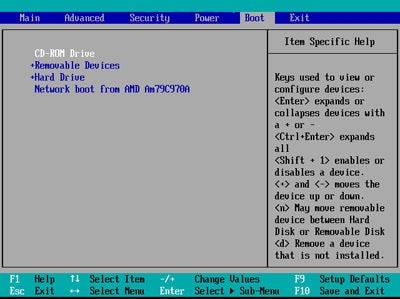
Use the +/- keys to change the boot order until the option at the top of the list is CD-ROM Drive
(Be sure to read the instructional legend for which keys do what with each system. There may be variations to what you are seeing in this example.)
With CD-ROM now populating the top spot in the Boot Order, this means that the computer, upon reboot, will look at the CD drive first for what to use. Now as you know, what is on your newly made Linux CD??? The new Ubuntu .iso that will be used for the boot sequence.
Before your Boot Order will take effect though, you will need to save these changes to the BIOS. You can use the legend at the bottom of your screen to guide you through how to Save and Exit the BIOS Setup page (different systems will have different ways of doing this).
Once you have your BIOS settings changed, you can now reboot your system. Upon reboot you will see a statement from your system saying Press any key to boot from CD.....
You have done it.....now let's take a look at Linux Ubuntu. ![]()
------------------
Once your system starts to reboot, you will notice that the CD-ROM is working. At this time, the system is using the disk in the CD-ROM to boot to Linux Ubuntu.
You will momentarily be looking at a big, purple screen with the name Ubuntu on it as seen below.
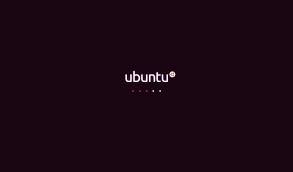
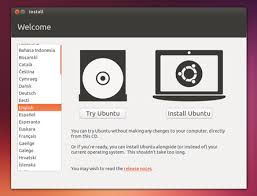
Not long after that you will notice the screen change to what looks like the beginning of a standard Desktop and a popup window will start. This popup window will ask you if you would like to Try Ubuntu or Install Ubuntu. Only select Try Ubuntu!!
***Do Not press Install Ubuntu until you are ready to use it permanently and you have a backup of all your files on your Windows system!! It can delete all of your files and there is no recovery!!***
Once you select to Try Ubuntu, your Linux Ubuntu Live Desktop will boot to a page that looks similar to this:
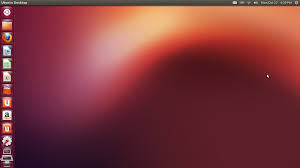
By using the selection Try Ubuntu, you will be able to continually try Linux Ubuntu on the CD without making any changes whatsoever to your Windows system on your hard drive.
Enjoy exploring the possibilities there are with LInux and deciding if this might be what takes the place of your Windows XP system.
I hope you enjoyed this and found it helpful! ![]()


